背景
查东西的时候,有些文章在简书,然后在浏览简书的时候,未登录时会弹出登录框,很烦人,所以想屏蔽掉。也想把右边的热门故事和底部的推荐关闭掉。说实话,我对《离婚后,妈宝男前夫后悔了》之类的是真的不感兴趣啊。。。所以就想通过 js 实现过滤掉这三部分。通过暴力猴,然后自己实现一个过滤脚本,具体步骤如下:
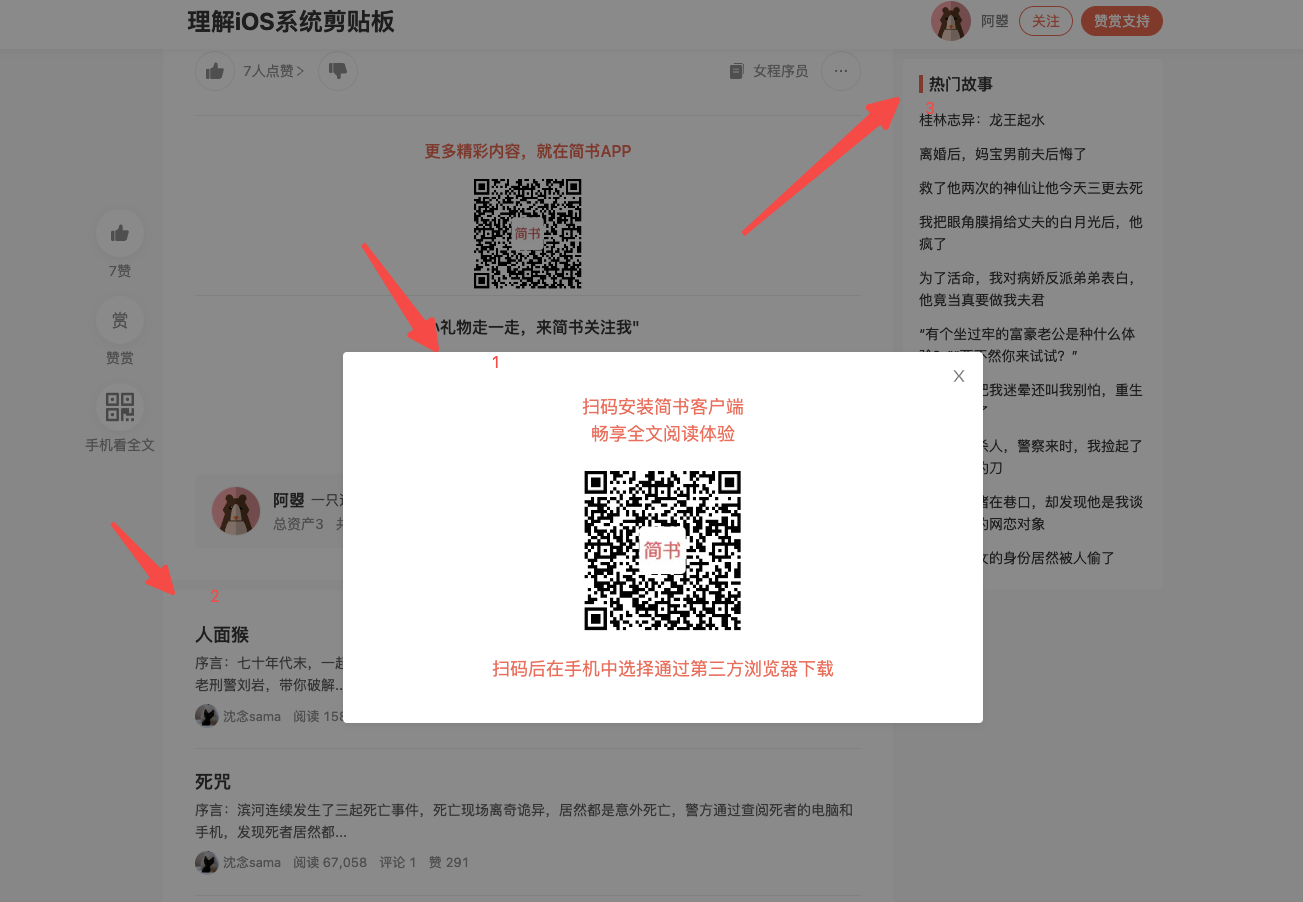
首先明确需求,要移除的共有三个部分,
如下图所示:
然后一步步来看。
实现
登陆框的移除
查看网页源代码,对比登录框弹出前后,可以看出,当登陆框弹出时,body的style变为了overflow: hidden;;且尾部多了一个div。如下图:
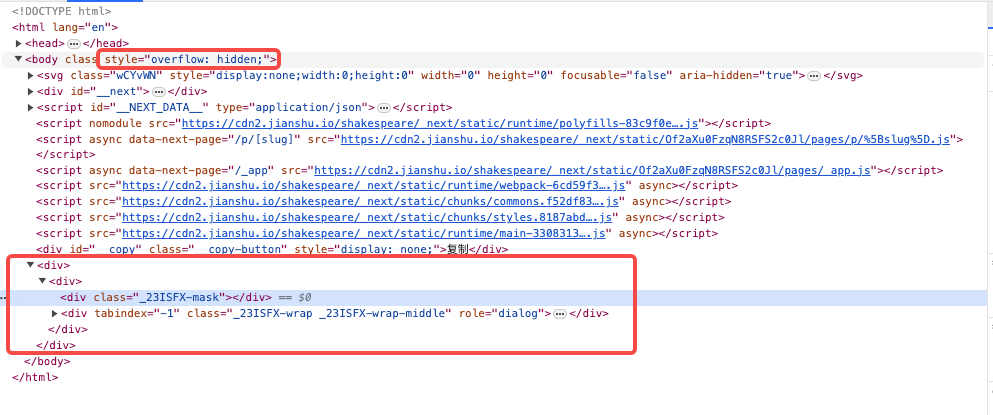
所以如果想要去除登陆框,要做的就是在登陆框弹出时,移除尾部的div,并把body的style改为none。问题是,如何判断登陆框弹出时?
有两种方案,一种是监听滚动的位置,因为观察发现,登陆框是滚动到指定位置时才弹出的。还有一种是,换一个思路,监听 body 的 style,当body的style变为overflow: hidden;时,说明登陆框弹出了。
这里采用方法二,因为方法一太麻烦了,而且,如果滚动位置不对,会导致登陆框弹出时,移除尾部div失败。
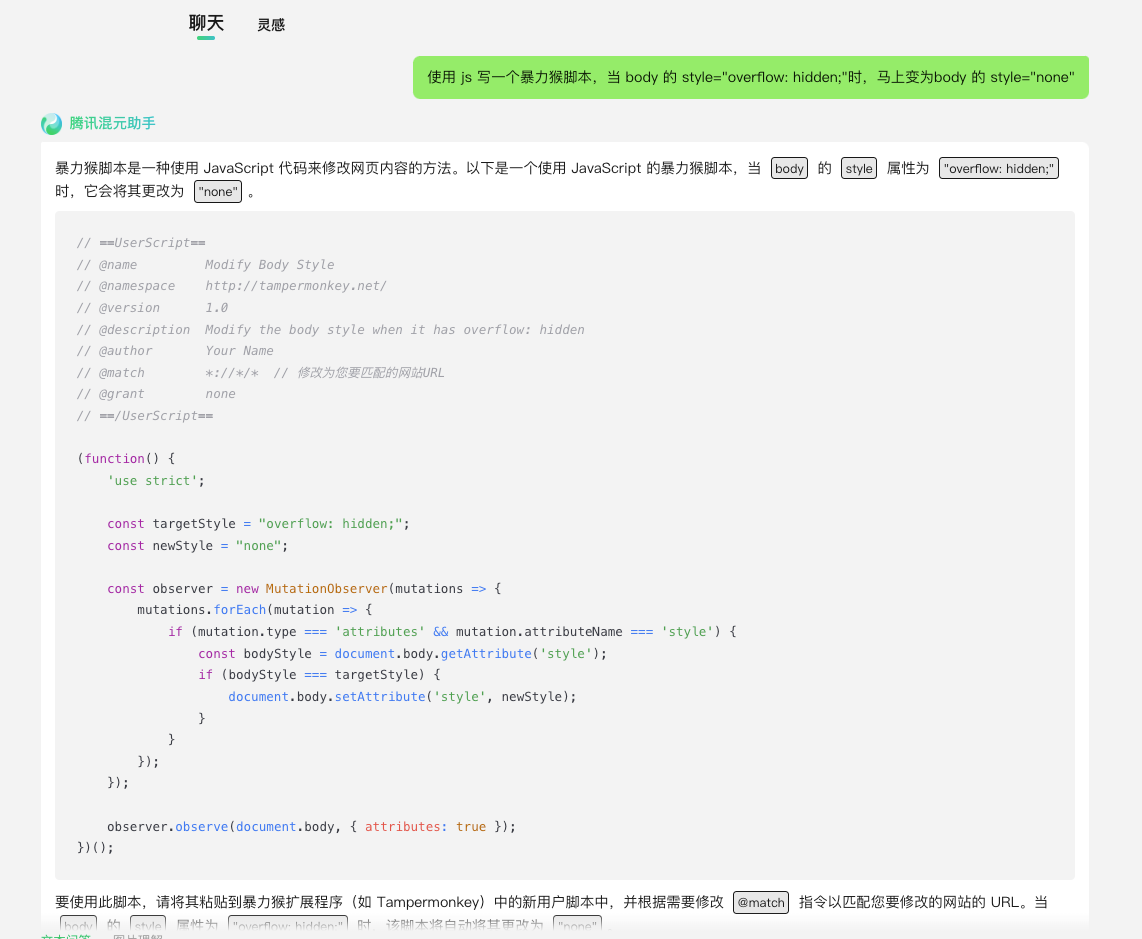
然后问题来了,要怎么用代码实现呢?哈哈哈,我不会,但是我知道谁会,找到腾讯混元助手,如下提问使用 js 写一个暴力猴脚本,当 body 的 style="overflow: hidden;"时,马上变为body 的 style="none":如下图,
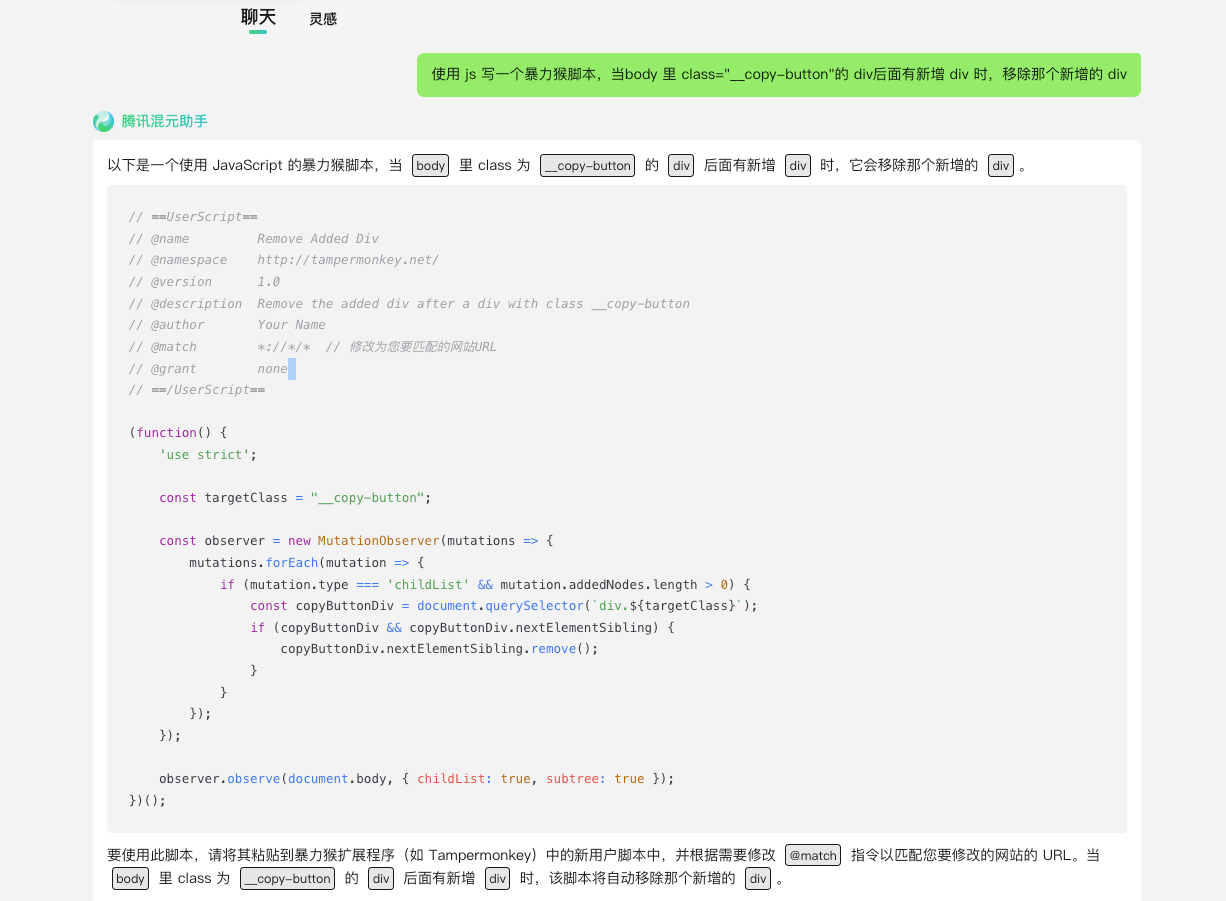
上面的方法只是将body的style改了,并没有移除尾部div,所以,还需要移除尾部div。而移除尾部div,同样,我们让腾讯混元助手帮我们实现,告诉他使用 js 写一个暴力猴脚本,当body 里 class="__copy-button"的 div后面有新增 div 时,移除那个新增的 div,因为通过观察发现,简书弹出登陆框,是在尾部插入了一个新的div,所以通过判断没弹登录之前最后的div,如果后面多出了一个div,就移除这个div。如下图:
然后找到暴力猴,点击 dashboard,新增一个 script,把上面混元助手生成的代码稍微修改后添加进去,并设置匹配的网站,最终如下:
1
2
3
4
5
6
7
8
9
10
11
12
13
14
15
16
17
18
19
20
21
22
23
24
25
26
27
28
29
30
31
32
33
34
35
36
37
38
39
40
41
42
43
44
45
46
|
(function() {
'use strict';
const targetStyle = "overflow: hidden;";
const newStyle = "none";
const styleObserver = new MutationObserver(mutations => {
mutations.forEach(mutation => {
if (mutation.type === 'attributes' && mutation.attributeName === 'style') {
const bodyStyle = document.body.getAttribute('style');
if (bodyStyle === targetStyle) {
document.body.setAttribute('style', newStyle);
}
}
});
});
styleObserver.observe(document.body, { attributes: true });
const targetClass = "__copy-button";
const childListObserver = new MutationObserver(mutations => {
mutations.forEach(mutation => {
if (mutation.type === 'childList' && mutation.addedNodes.length > 0) {
const copyButtonDiv = document.querySelector(`div.${targetClass}`);
if (copyButtonDiv && copyButtonDiv.nextElementSibling) {
copyButtonDiv.nextElementSibling.remove();
}
}
});
});
childListObserver.observe(document.body, { childList: true, subtree: true });
})();
|
保存,然后任意打开简书一篇文章,比如:理解iOS系统剪贴板,测试,可以看到未登录上下滑动时,登陆框不会弹出了。第一步移除登陆框搞定。
移除底部推荐
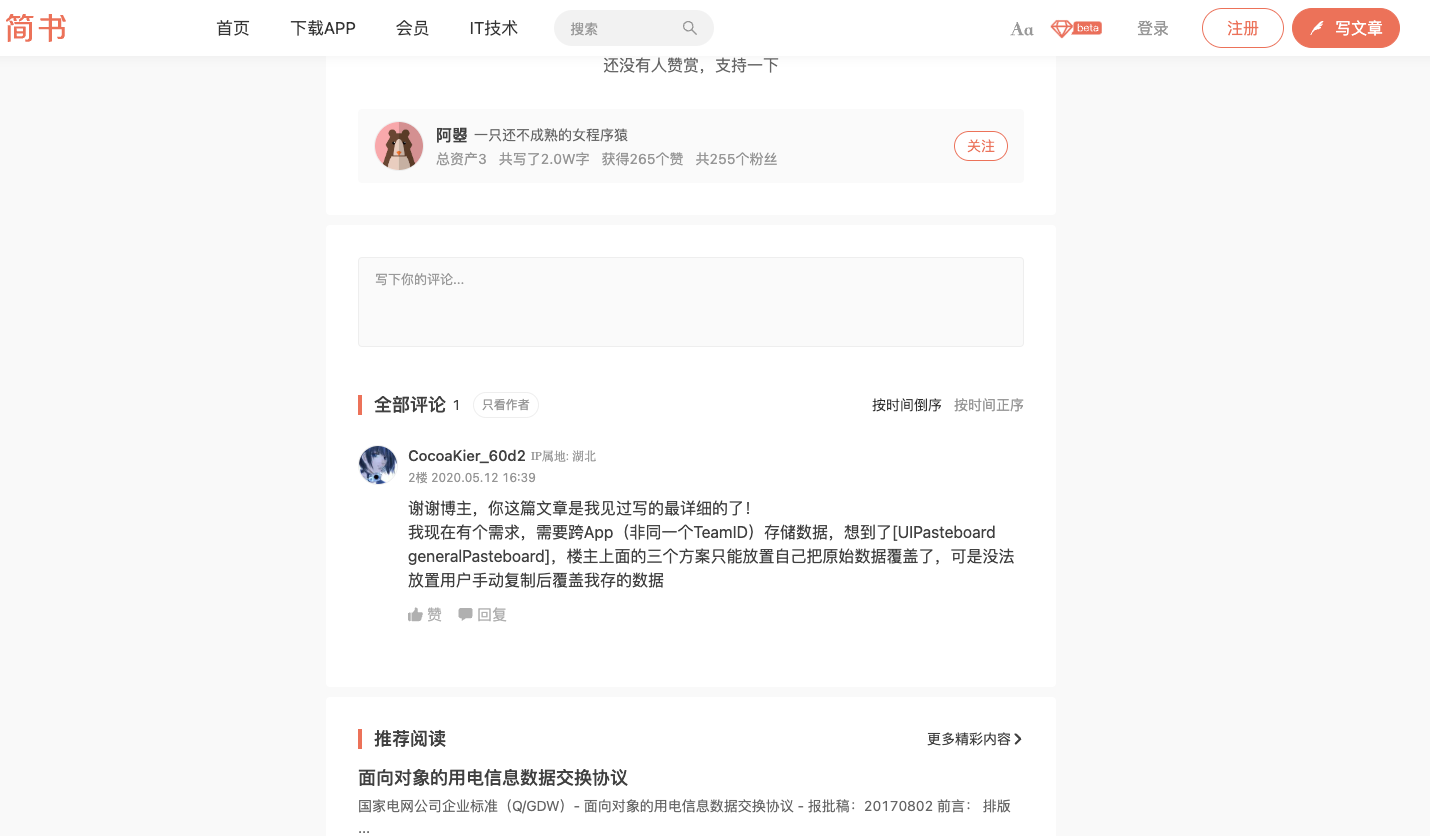
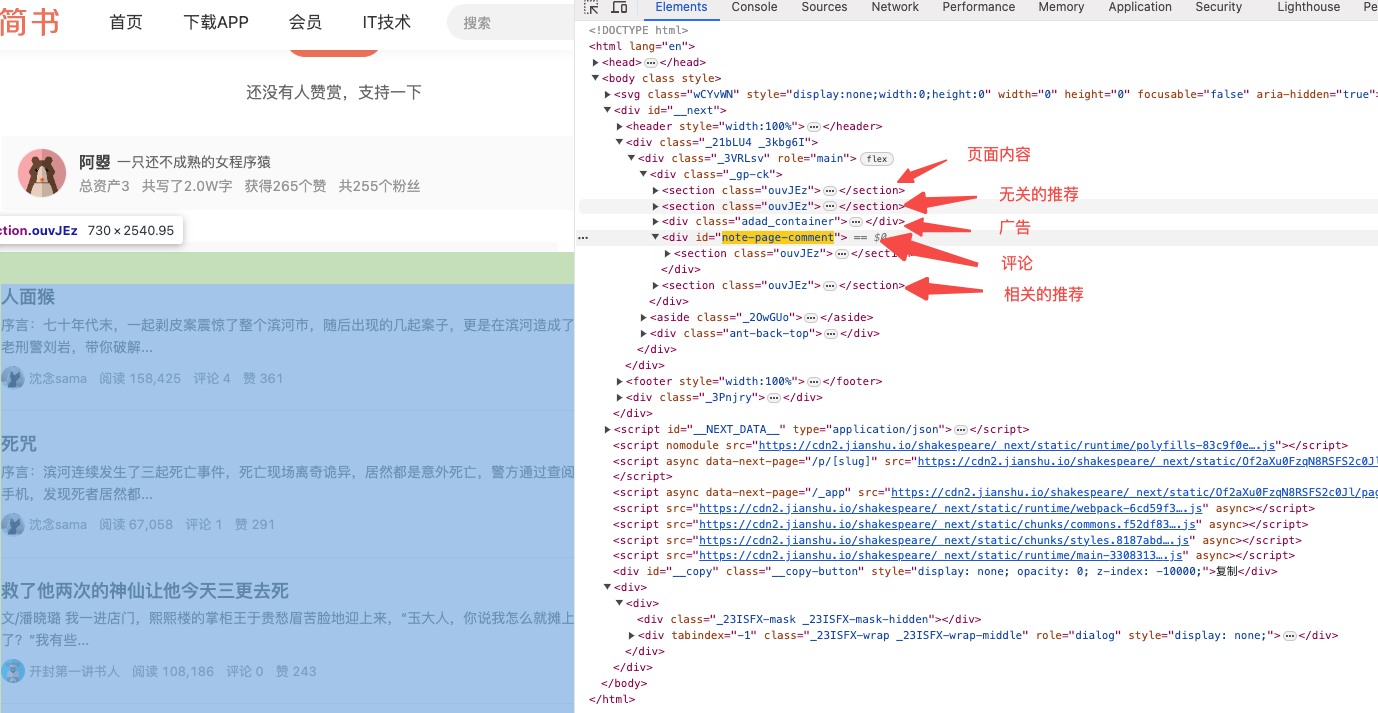
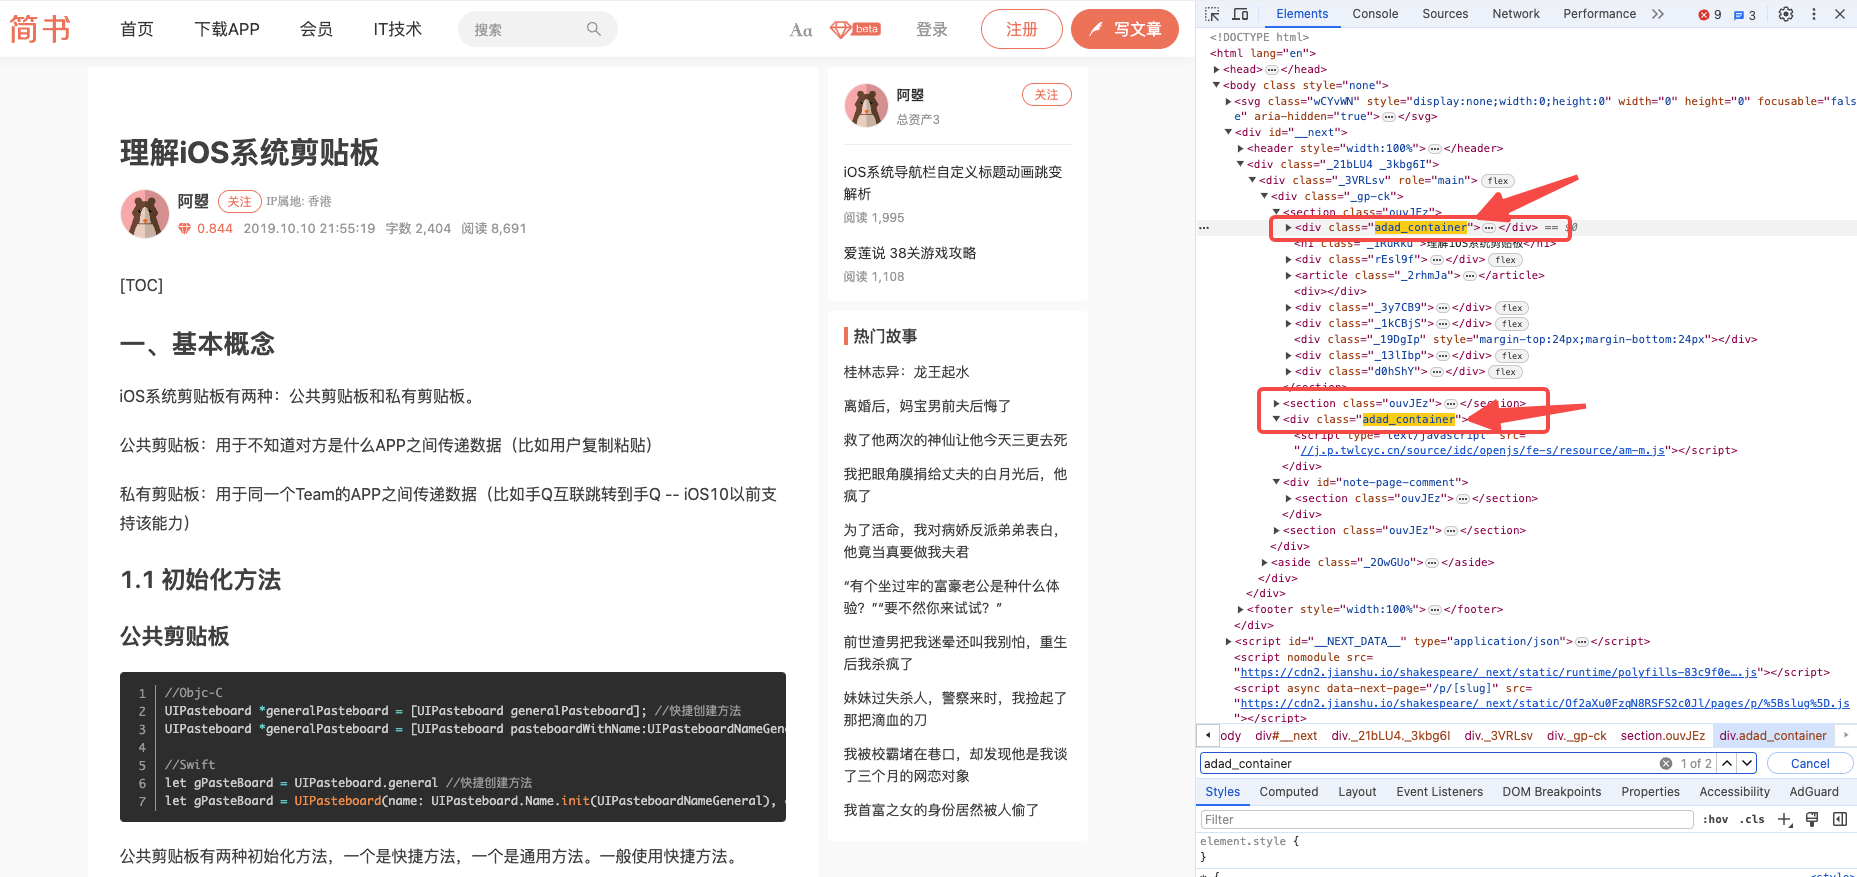
同样查看源代码,如下图,可以看到待移除的推荐的部分是第二个<section class="ouvJEz">,第一个<section class="ouvJEz">是正常内容部分,第三个<section class="ouvJEz">是内容相关的推荐。第二个和第三个<section class="ouvJEz">之间有两个<div>,<div class="adad_container">是广告,<div id="note-page-comment">是评价模块。如下图所示:
移除的方式有两种,一种是简单直接的,获取到class="ouvJEz"的section,然后移除第二个;另外一种是找打广告模块,然后移除广告模块和广告前面的<section class="ouvJEz">;
首先来看第一种方式,告诉混元助手:”使用 js 写一个暴力猴脚本,移除第二个class=”ouvJEz”的 section”,如下图:

然后加入到暴力猴脚本中测试,发现不生效;什么原因呢?是判断条件没有满足?还是其他?
通过添加alert,可以看到走到了判断条件,但是页面上却没有移除?这又是怎么回事呢?判断可能是因为移除时,数据还请求返回,等数据返回时,又重新把这个section添加了回来;简单的说,就是删的早了。那尝试一下添加个1秒延时再去删除,测试后,发现生效了,最终代码如下:
1
2
3
4
5
6
7
8
9
10
11
12
13
14
15
16
17
18
19
20
21
22
23
24
25
26
27
28
29
30
31
32
33
34
35
36
37
38
39
40
41
42
43
44
45
46
47
48
49
50
51
52
53
54
55
|
(function() {
'use strict';
const targetStyle = "overflow: hidden;";
const newStyle = "none";
const styleObserver = new MutationObserver(mutations => {
mutations.forEach(mutation => {
if (mutation.type === 'attributes' && mutation.attributeName === 'style') {
const bodyStyle = document.body.getAttribute('style');
if (bodyStyle === targetStyle) {
document.body.setAttribute('style', newStyle);
}
}
});
});
styleObserver.observe(document.body, { attributes: true });
const targetClass = "__copy-button";
const childListObserver = new MutationObserver(mutations => {
mutations.forEach(mutation => {
if (mutation.type === 'childList' && mutation.addedNodes.length > 0) {
const copyButtonDiv = document.querySelector(`div.${targetClass}`);
if (copyButtonDiv && copyButtonDiv.nextElementSibling) {
copyButtonDiv.nextElementSibling.remove();
}
}
});
});
childListObserver.observe(document.body, { childList: true, subtree: true });
const recommendClass = "ouvJEz";
const sections = document.querySelectorAll(`section.${recommendClass}`);
if (sections.length >= 2) {
setTimeout(() => {
sections[1].remove();
}, 1000);
}
})();
|
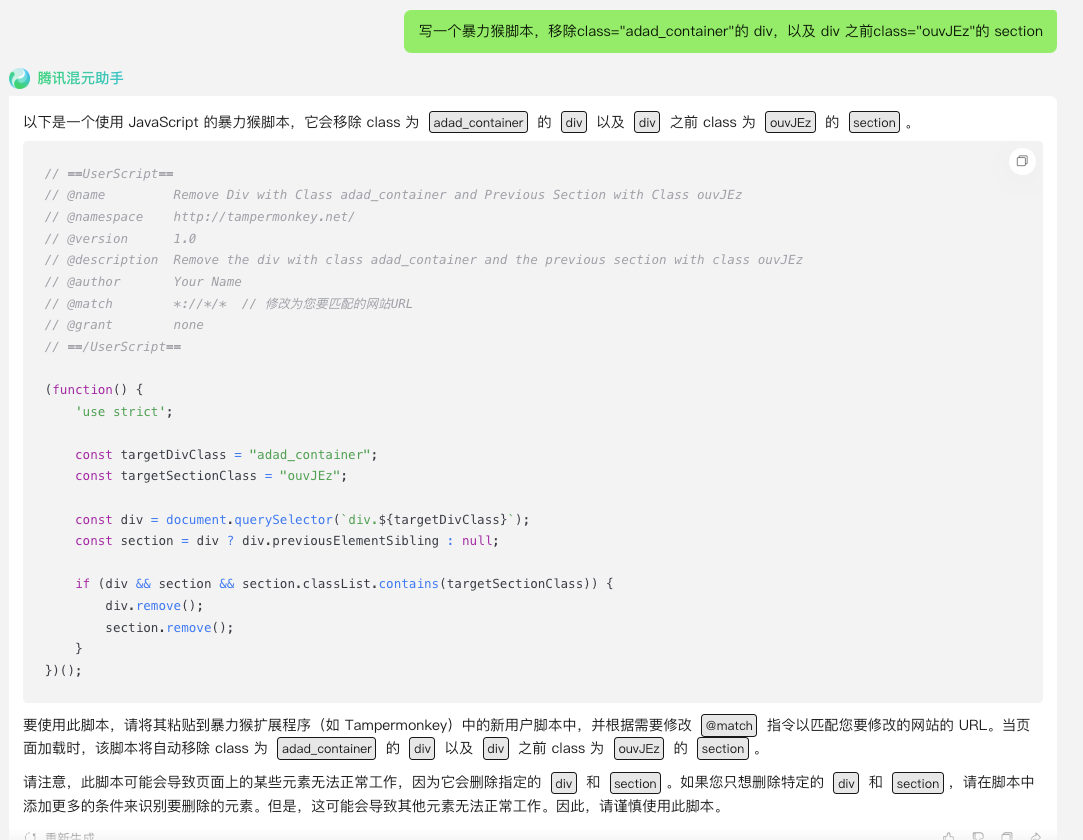
再来看下使用第二种方式实现,即:找到广告模块,然后移除广告模块和广告前面的<section class="ouvJEz">;询问混元助手:写一个暴力猴脚本,移除class="adad_container"的 div,以及 div 之前class="ouvJEz"的 section,如下图所示:
调试之后发现失败了,什么原因呢?逻辑上是没有问题的,仔细排查之后,发现是因为<div class="adad_container"> 有两个,我们预期的是,获取到第二个的<div class="adad_container">,但是获取到的是第一个,所以获取到previousElementSibling元素失败,然后就移除失败。如下图所示:
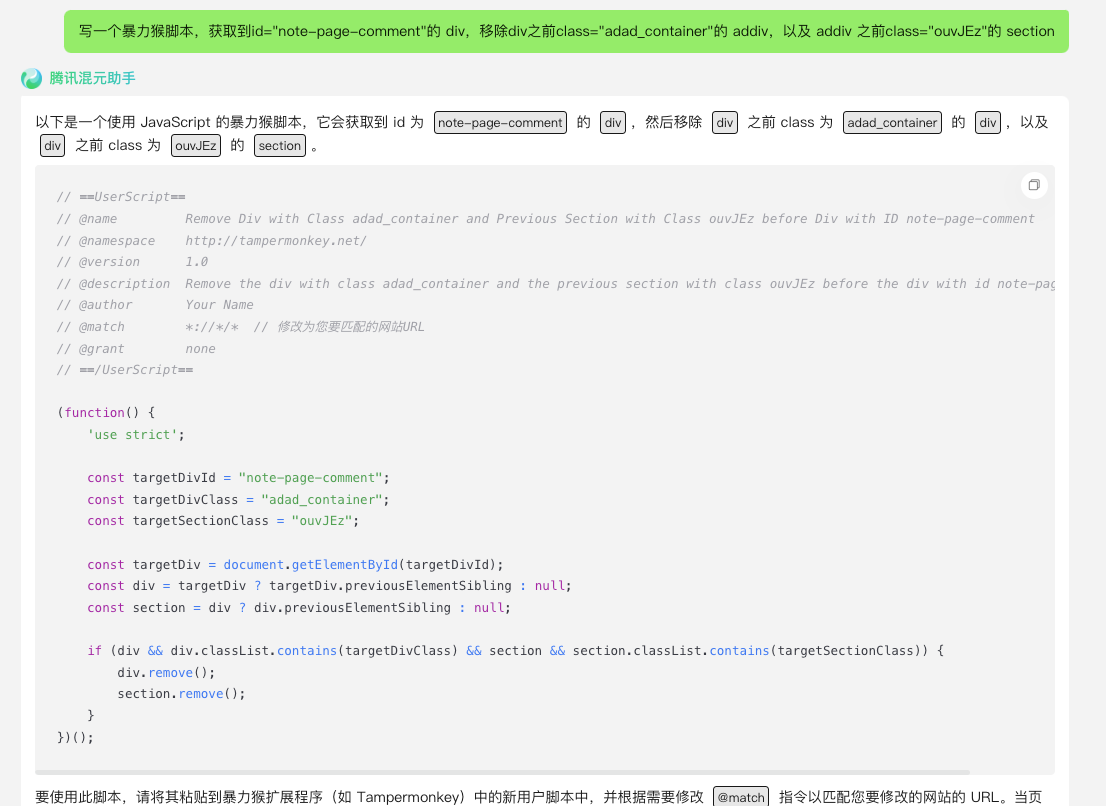
那么如何解决呢?其实广告模块我并不在意,因为 AdGuard 已经屏蔽了,我真正想移除的是推荐模块,广告只是作为获取推荐的标记,被顺手移除;既然广告模块不唯一不方便作为定位,那就换个唯一的模块,比如评论模块,所以逻辑就变成了,获取到评论模块,然后移除评论模块前面的广告模块和广告前面的推荐模块。询问混元助手:写一个暴力猴脚本,获取到id="note-page-comment"的 div,移除div之前class="adad_container"的 addiv,以及 addiv 之前class="ouvJEz"的 section,如下图所示:
然后测试,发现可以生效,最终代码如下:
1
2
3
4
5
6
7
8
9
10
11
12
13
14
15
16
17
18
19
20
21
22
23
24
25
26
27
28
29
30
31
32
33
34
35
36
37
38
39
40
41
42
43
44
45
46
47
48
49
50
51
52
53
54
55
56
57
58
59
60
61
62
63
64
65
66
67
68
69
70
|
(function() {
'use strict';
const targetStyle = "overflow: hidden;";
const newStyle = "none";
const styleObserver = new MutationObserver(mutations => {
mutations.forEach(mutation => {
if (mutation.type === 'attributes' && mutation.attributeName === 'style') {
const bodyStyle = document.body.getAttribute('style');
if (bodyStyle === targetStyle) {
document.body.setAttribute('style', newStyle);
}
}
});
});
styleObserver.observe(document.body, { attributes: true });
const targetClass = "__copy-button";
const childListObserver = new MutationObserver(mutations => {
mutations.forEach(mutation => {
if (mutation.type === 'childList' && mutation.addedNodes.length > 0) {
const copyButtonDiv = document.querySelector(`div.${targetClass}`);
if (copyButtonDiv && copyButtonDiv.nextElementSibling) {
copyButtonDiv.nextElementSibling.remove();
}
}
});
});
childListObserver.observe(document.body, { childList: true, subtree: true });
setTimeout(() => {
const targetDivId = "note-page-comment";
const targetDivClass = "adad_container";
const targetSectionClass = "ouvJEz";
const targetDiv = document.getElementById(targetDivId);
const div = targetDiv ? targetDiv.previousElementSibling : null;
const section = div ? div.previousElementSibling : null;
if (div && div.classList.contains(targetDivClass) && section && section.classList.contains(targetSectionClass)) {
div.remove();
section.remove();
}
}, 500);
})();
|
两种方法都能实现,方法一比较简单直接,但是依赖了index,而方法二根据评论模块来定位,如果简书有修改,其实两种方法都存在变动的可能。
移除右侧的热门故事
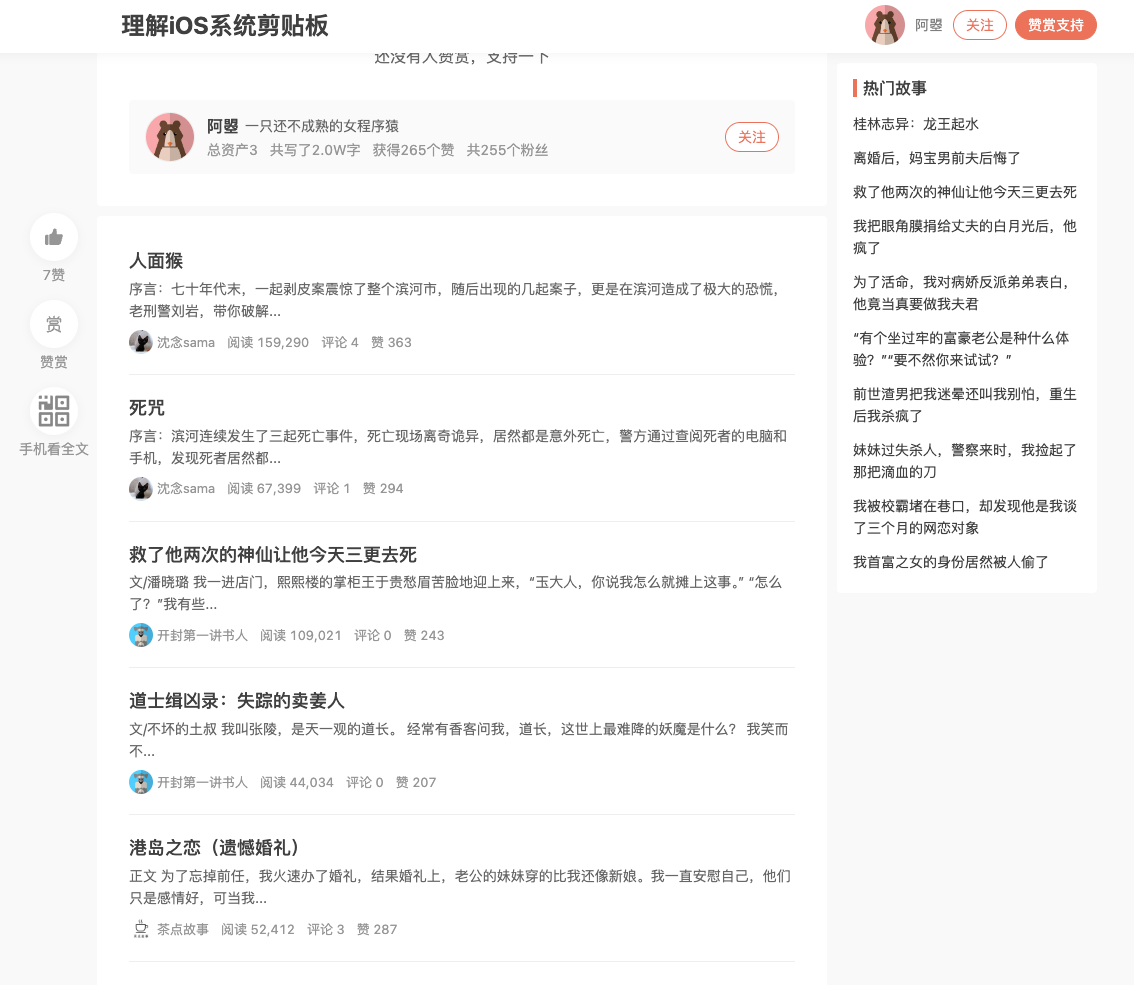
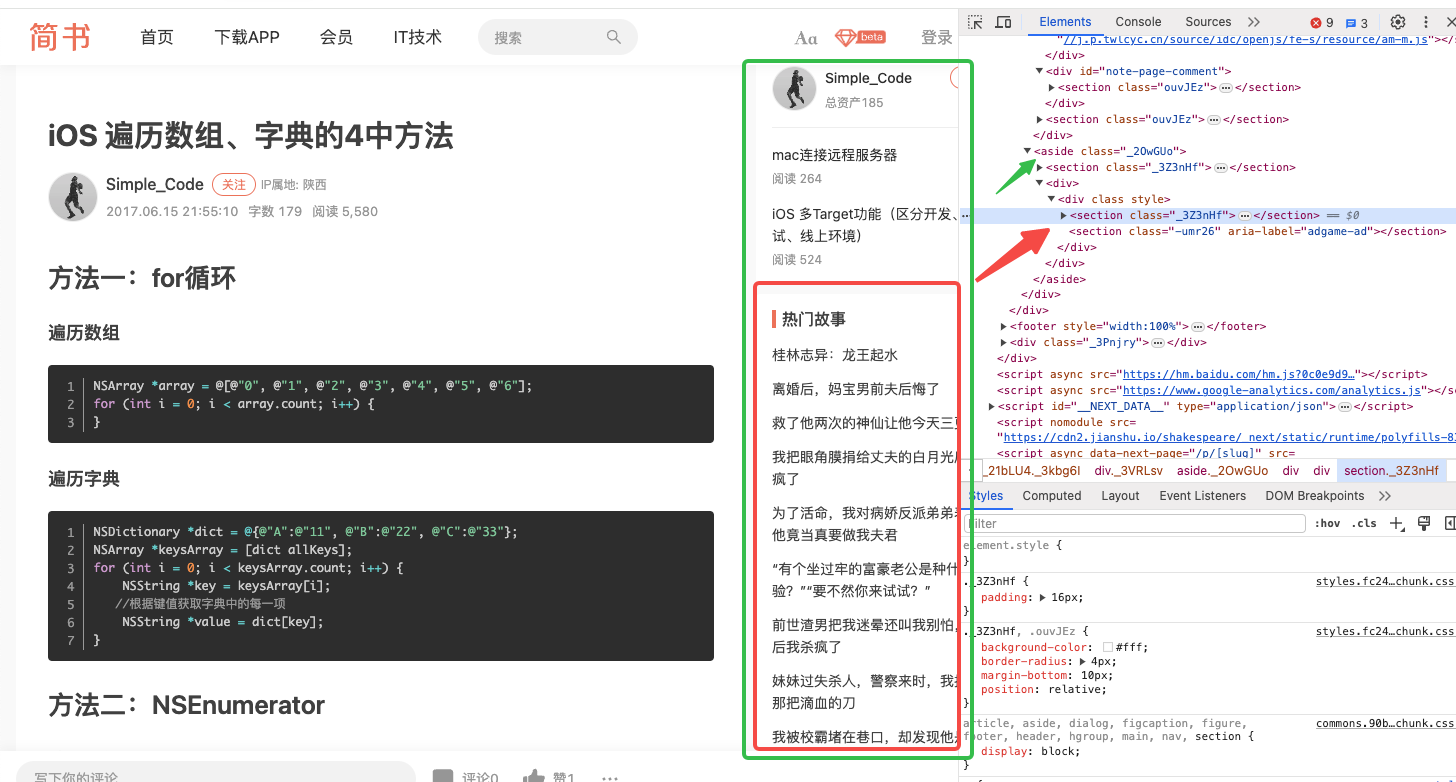
先来看图,如下图所示,真正想移除的是红框的部分,但是绿框部分整个移除更简单,也不影响,所以选择整个移除 aside。
告诉混元助手:写一个暴力猴脚本,实现移除class="_2OwGUo"的 aside,如下图所示:
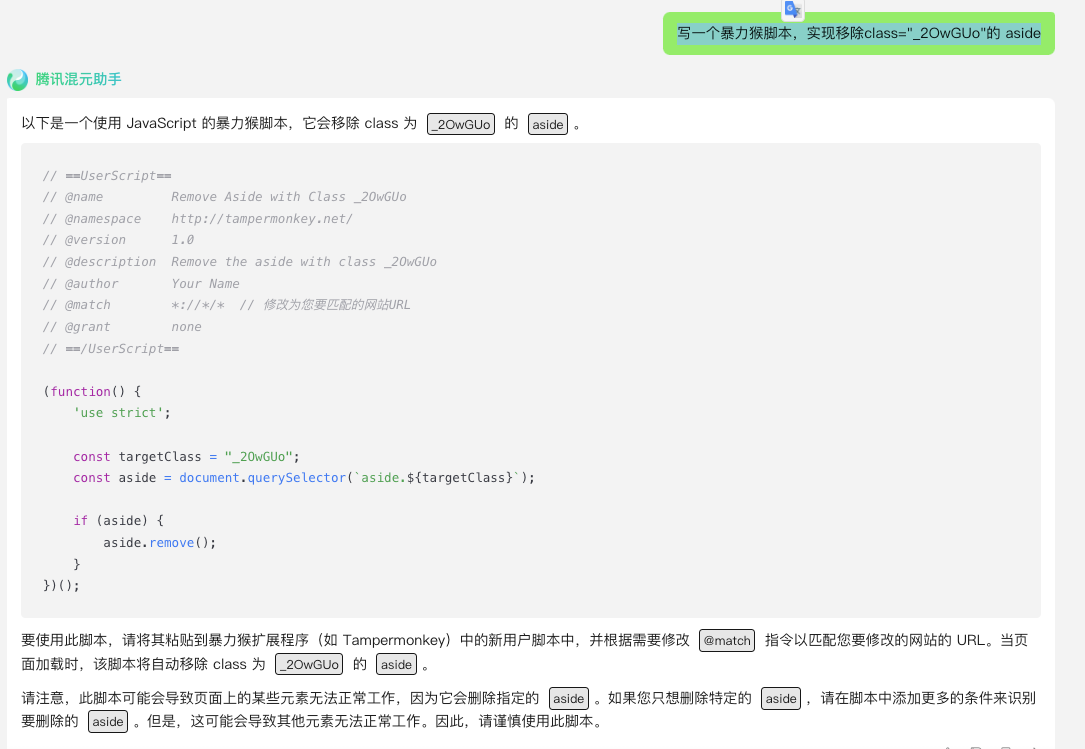
然后测试,发现没有生效,和移除推荐同样的问题,添加一个延时就可解决,最终代码如下:
1
2
3
4
5
6
7
8
9
10
11
12
13
14
15
16
17
18
19
20
21
22
23
24
25
26
27
28
29
30
31
32
33
34
35
36
37
38
39
40
41
42
43
44
45
46
47
48
49
50
51
52
53
54
55
56
57
58
59
60
61
62
63
64
65
66
67
68
69
70
71
72
73
74
75
76
77
78
|
(function() {
'use strict';
const targetStyle = "overflow: hidden;";
const newStyle = "none";
const styleObserver = new MutationObserver(mutations => {
mutations.forEach(mutation => {
if (mutation.type === 'attributes' && mutation.attributeName === 'style') {
const bodyStyle = document.body.getAttribute('style');
if (bodyStyle === targetStyle) {
document.body.setAttribute('style', newStyle);
}
}
});
});
styleObserver.observe(document.body, { attributes: true });
const targetClass = "__copy-button";
const childListObserver = new MutationObserver(mutations => {
mutations.forEach(mutation => {
if (mutation.type === 'childList' && mutation.addedNodes.length > 0) {
const copyButtonDiv = document.querySelector(`div.${targetClass}`);
if (copyButtonDiv && copyButtonDiv.nextElementSibling) {
copyButtonDiv.nextElementSibling.remove();
}
}
});
});
childListObserver.observe(document.body, { childList: true, subtree: true });
setTimeout(() => {
const targetDivId = "note-page-comment";
const targetDivClass = "adad_container";
const targetSectionClass = "ouvJEz";
const targetDiv = document.getElementById(targetDivId);
const div = targetDiv ? targetDiv.previousElementSibling : null;
const section = div ? div.previousElementSibling : null;
if (div && div.classList.contains(targetDivClass) && section && section.classList.contains(targetSectionClass)) {
div.remove();
section.remove();
}
}, 500);
const asideClass = "_2OwGUo";
const aside = document.querySelector(`aside.${asideClass}`);
if (aside) {
setTimeout(() => {
aside.remove();
}, 1000);
}
})();
|
最后,既然右侧的热门故事移除了,左侧那个浮动的赞、推荐、手机阅读,就也显示有点annoying了,顺手也给移除了,如下图所示:
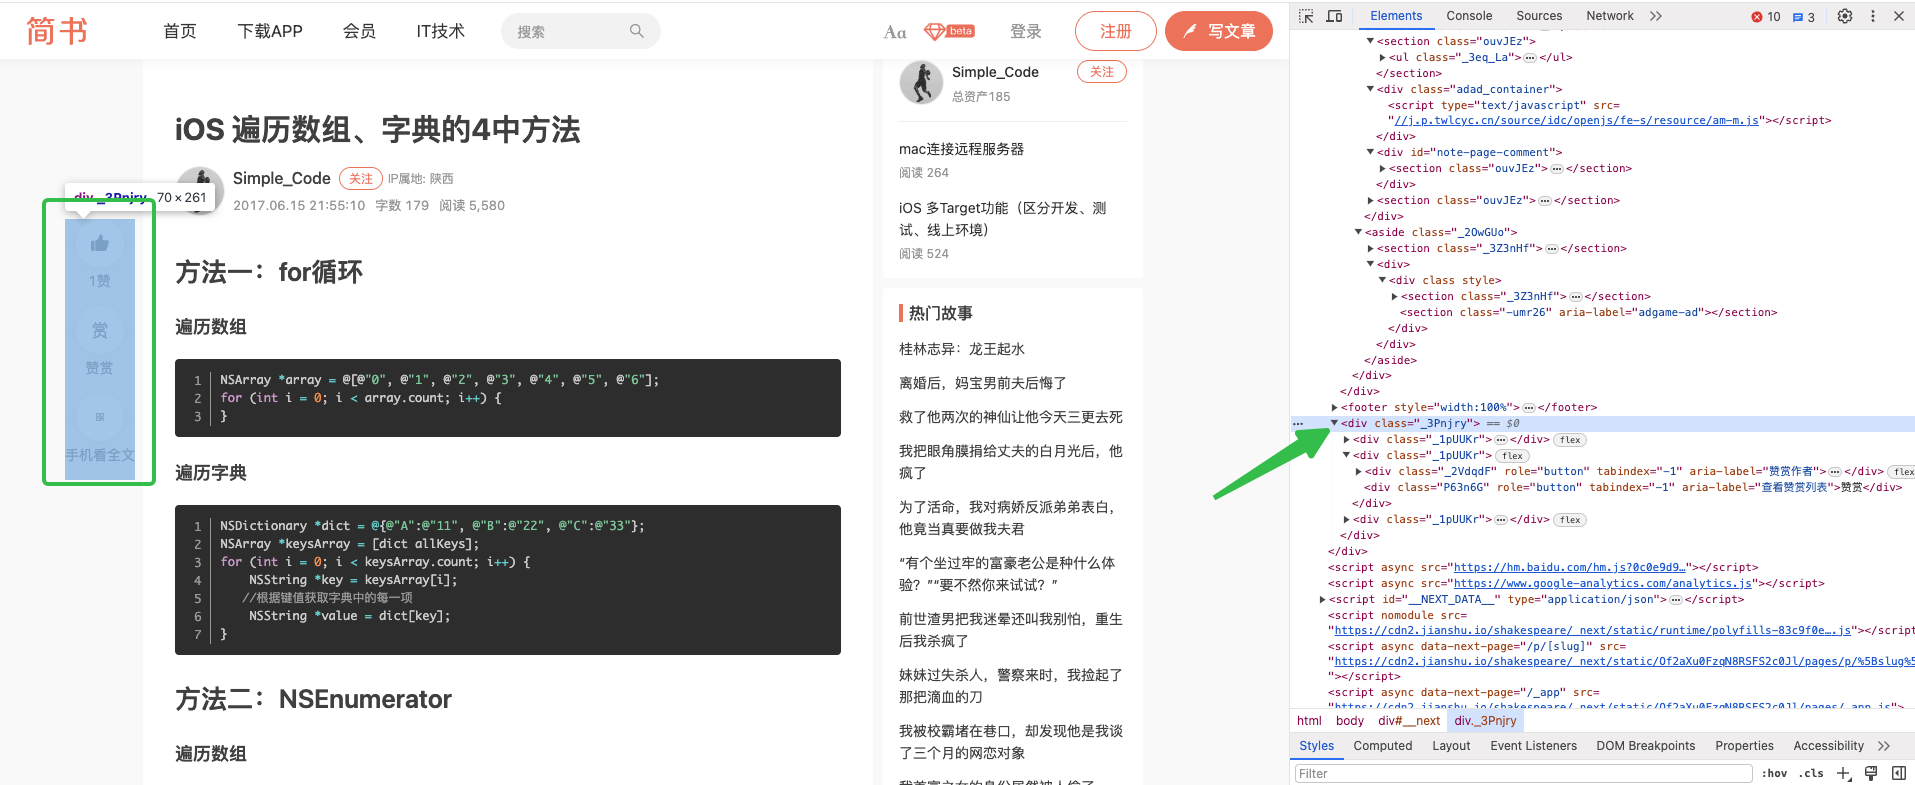
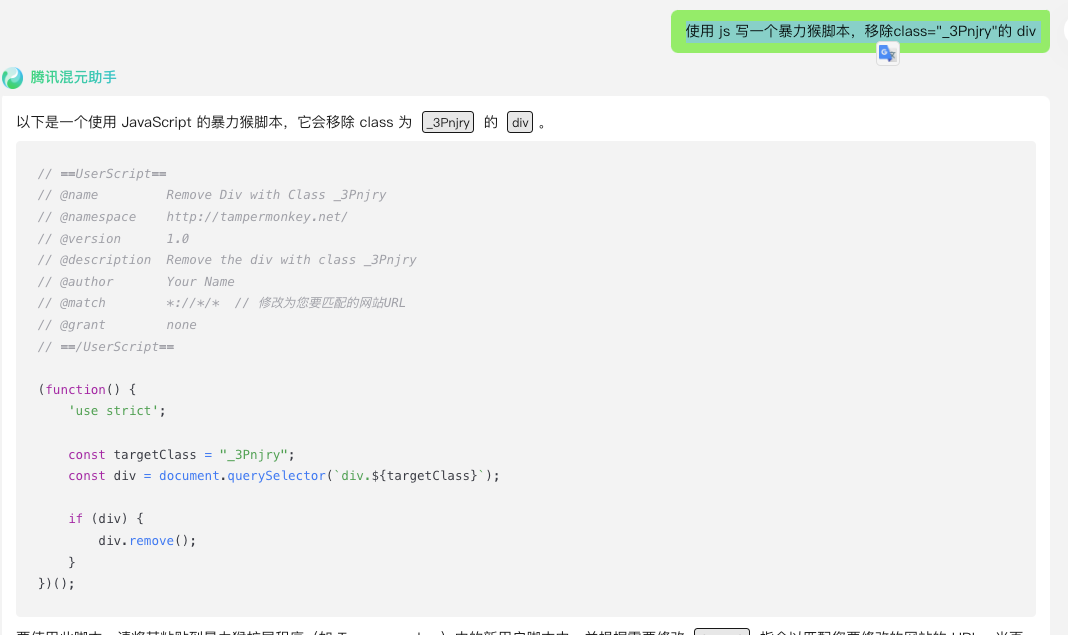
告诉混元助手:使用 js 写一个暴力猴脚本,移除class="_3Pnjry"的 div,如下图所示:
同样添加一个延时生效,最终完整版代码如下:
1
2
3
4
5
6
7
8
9
10
11
12
13
14
15
16
17
18
19
20
21
22
23
24
25
26
27
28
29
30
31
32
33
34
35
36
37
38
39
40
41
42
43
44
45
46
47
48
49
50
51
52
53
54
55
56
57
58
59
60
61
62
63
64
65
66
67
68
69
70
71
72
73
74
75
76
77
78
79
80
81
82
83
84
85
86
87
|
(function() {
'use strict';
const targetStyle = "overflow: hidden;";
const newStyle = "none";
const styleObserver = new MutationObserver(mutations => {
mutations.forEach(mutation => {
if (mutation.type === 'attributes' && mutation.attributeName === 'style') {
const bodyStyle = document.body.getAttribute('style');
if (bodyStyle === targetStyle) {
document.body.setAttribute('style', newStyle);
}
}
});
});
styleObserver.observe(document.body, { attributes: true });
const targetClass = "__copy-button";
const childListObserver = new MutationObserver(mutations => {
mutations.forEach(mutation => {
if (mutation.type === 'childList' && mutation.addedNodes.length > 0) {
const copyButtonDiv = document.querySelector(`div.${targetClass}`);
if (copyButtonDiv && copyButtonDiv.nextElementSibling) {
copyButtonDiv.nextElementSibling.remove();
}
}
});
});
childListObserver.observe(document.body, { childList: true, subtree: true });
setTimeout(() => {
const targetDivId = "note-page-comment";
const targetDivClass = "adad_container";
const targetSectionClass = "ouvJEz";
const targetDiv = document.getElementById(targetDivId);
const div = targetDiv ? targetDiv.previousElementSibling : null;
const section = div ? div.previousElementSibling : null;
if (div && div.classList.contains(targetDivClass) && section && section.classList.contains(targetSectionClass)) {
div.remove();
section.remove();
}
}, 500);
const asideClass = "_2OwGUo";
const aside = document.querySelector(`aside.${asideClass}`);
if (aside) {
setTimeout(() => {
aside.remove();
}, 1000);
}
const leftAnnoyClass = "_3Pnjry";
const leftAnnoy = document.querySelector(`div.${leftAnnoyClass}`);
if (leftAnnoy) {
setTimeout(() => {
leftAnnoy.remove();
}, 1000);
}
})();
|
对比效果如下:
最后
最后,借助腾讯混元助手实现了屏蔽简书上不感兴趣的内容,不需要自己会 js,只需要明确自己想做的,然后借助混元助手,就能实现自己想要的效果,魅力就在于此。
Ps:最后,如果想要在 Safari 中使用,可以使用Userscripts 插件,参考Safari脚本编辑使用体验。